Many security professionals like myself have been wondering how to get hands-on experience with sentinel and play around with it given that it's still a relatively new tool. So I have put together this article as a guide to setting up and configuring your Sentinel Home Lab.
Let's dive in!
First and foremost there are a few prerequisites to deploying Sentinel; an Azure portal, an Active Subscription, a Resource group, and a Log Analytics Workspace.
- Azure portal account:
If you are new to Azure cloud, to get started you will need an Azure portal account. You can easily create a free account here or if you are a student, you can create an Azure for student account here.
- Active Subscription:
Azure free account comes with a subscription that grants you access to popular services free for 12 months, 40+ other services free always and $200 Azure credits which you'll have 30 days to use. While the Azure for student account grants you access to $100 Azure credit (with no time limit), Popular free services while you have your credit and no credit card required.
- Resource Group:
Login to your Azure portal, search for "Resource group" in the global search and select.

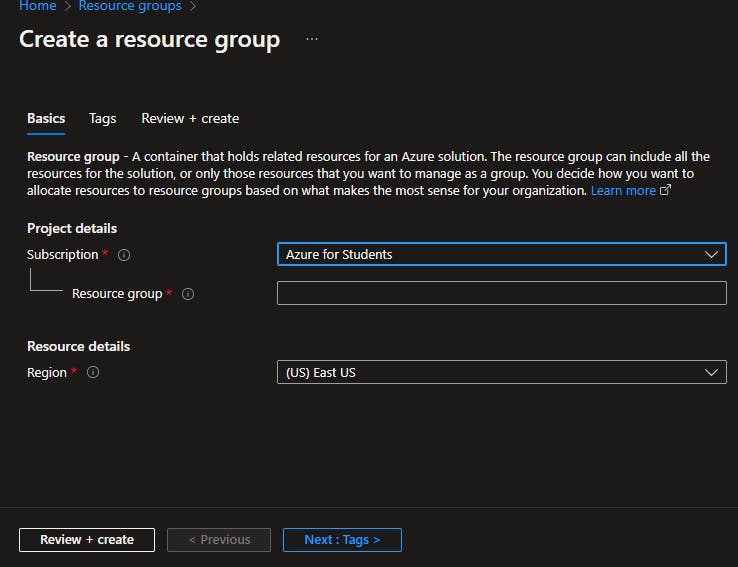
- Log Analytics Workspace:
A Log Analytics workspace is required to house all of the data that Microsoft Sentinel will be ingesting and using for its detection, analytics, and other features.
On your portal search for "Log Analytics Workspace" and select.
Click create.
Select your subscription and the resource group created in the previous step or your preferred resource group if you have one.
Give the Workspace a name, click Review + create > Create.
Deploy Sentinel
Now that we have all the prerequisites, let's configure and deploy Sentinel.
On your portal, search and select "Microsoft Sentinel".
Click create. You will be directed to the " Add Microsoft Sentinel to a workspace page". The Workspace we created earlier should appear as seen in the image. Select it and click "Add" at the bottom left.
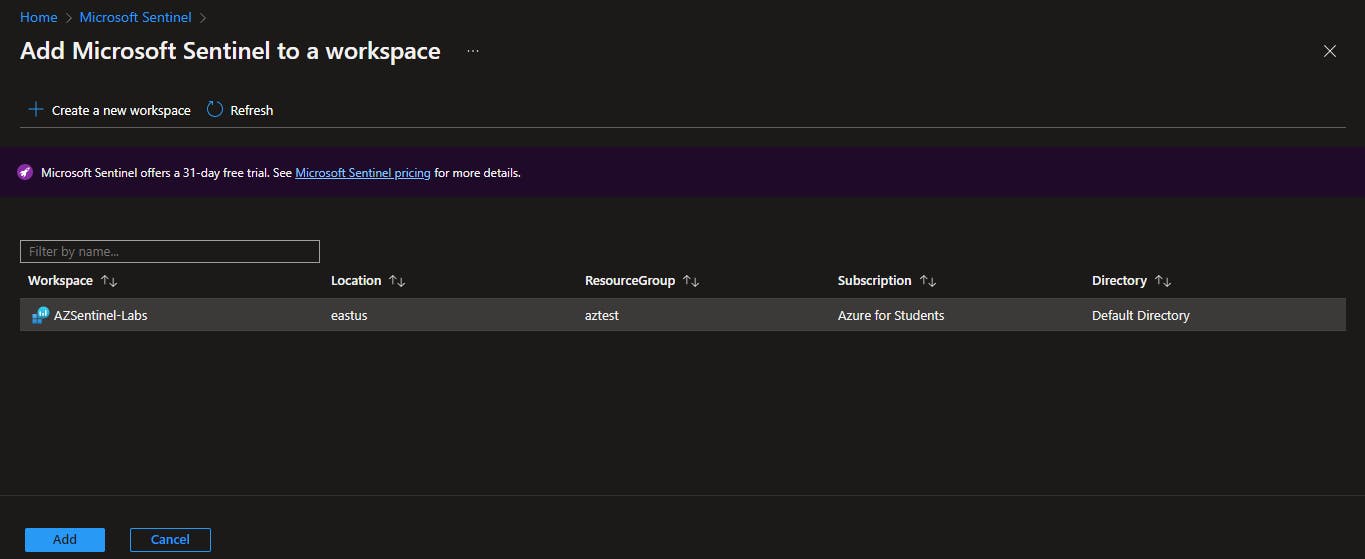
Wait for it to deploy, and you have deployed your first Sentinel Workspace! You'll be directed to the "Get Started" page.
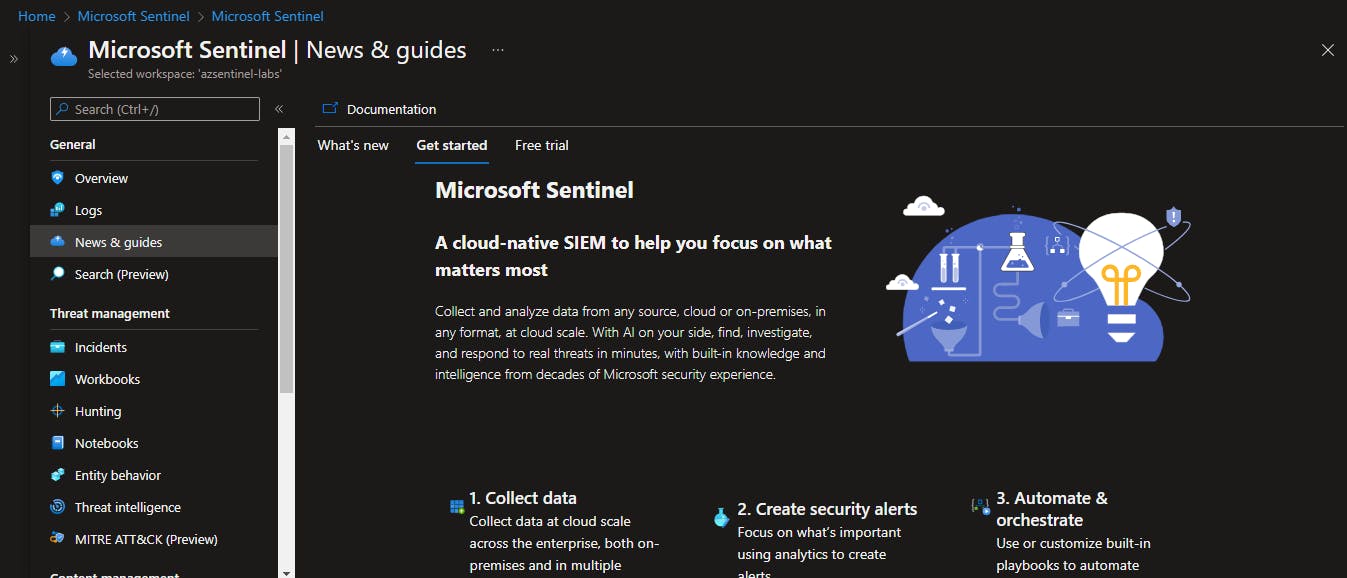
Now to answer some questions I'm sure you've had from the beginning, "How will I ingest data?" and "Where will I get data to ingest?"
There are 2 ways to achieve this goal; Connecting to data sources and Sample Data.
Connecting to Data Sources
Ideally, in a real-world situation, the next steps would be connecting the various data sources that need to be monitored e.g. Windows Event Logs, Office365, Azure AD, Azure Activity, Azure Virtual Machines, Storage Logs, etc. However, since we are building a lab for self-study/training, it is a lot more tasking to do all these manually and is highly unlikely to have data sources that generate enough events and incidents for learning purposes.
Steps
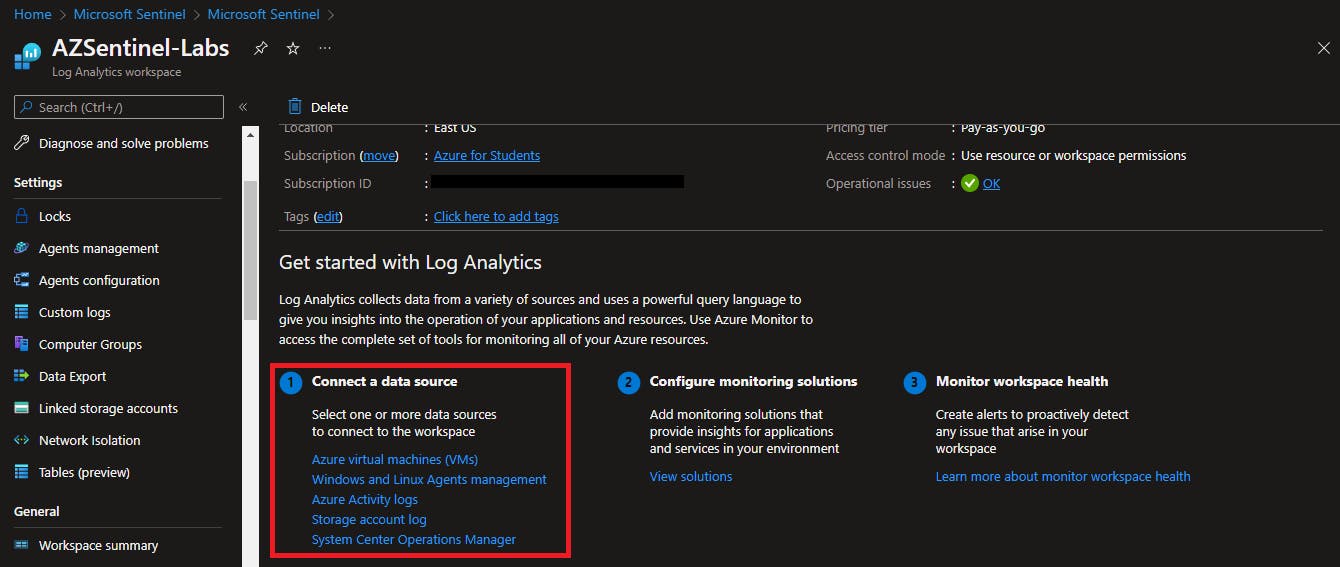
On your Sentinel dashboard, select the workspace that was created.
From the navigation panel to the left, select Settings > Workspace settings.
From the section highlighted, you can select and connect the different data sources as needed.
Sample Data
For the sake of this lab, we would be ingesting Microsoft Sentinel Training Lab solution. This solution ingests sample data into your Microsoft Sentinel workspace, triggering incidents that allow you to explore Microsoft Sentinel features without Additional effort.
The sample data contains 3 x Analytics Rules, 2 x Hunting queries, 2 x Parsers, 1 x Workbook, and 1 x Playbook. This pre-recorded data will land in the following custom log tables: SecurityEvent_CL, SigninLogs_CL, OfficeActivity_CL, AzureActivity_CL, Cisco_Umbrella_dns_CL. You don't have to worry about ingestion cost because this sample data is only 20MB in size and data below 10GB in the workspace is free.
Steps
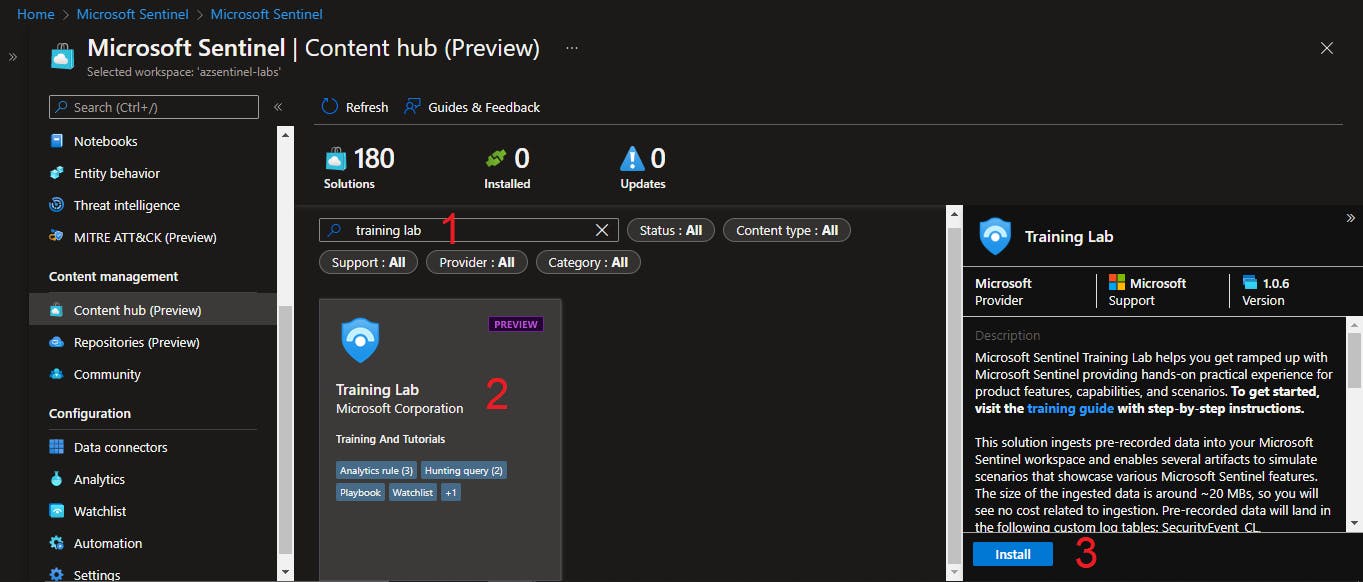
On your Sentinel dashboard, select the workspace that was created.
From the navigation panel to the left, select Content Hub.
Search Training Lab, select, and click "Install" at the bottom right.
- Click create.
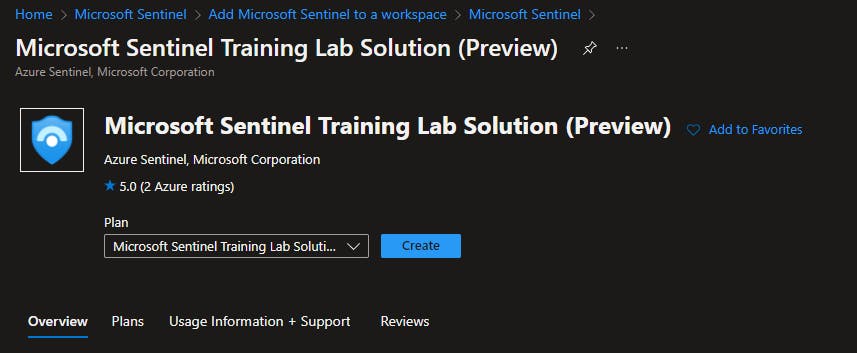
Select your Subscription, Resource group, and the workspace created then click Review + create > Create.
Wait for the deployment to complete. It can take up to 15 mins.

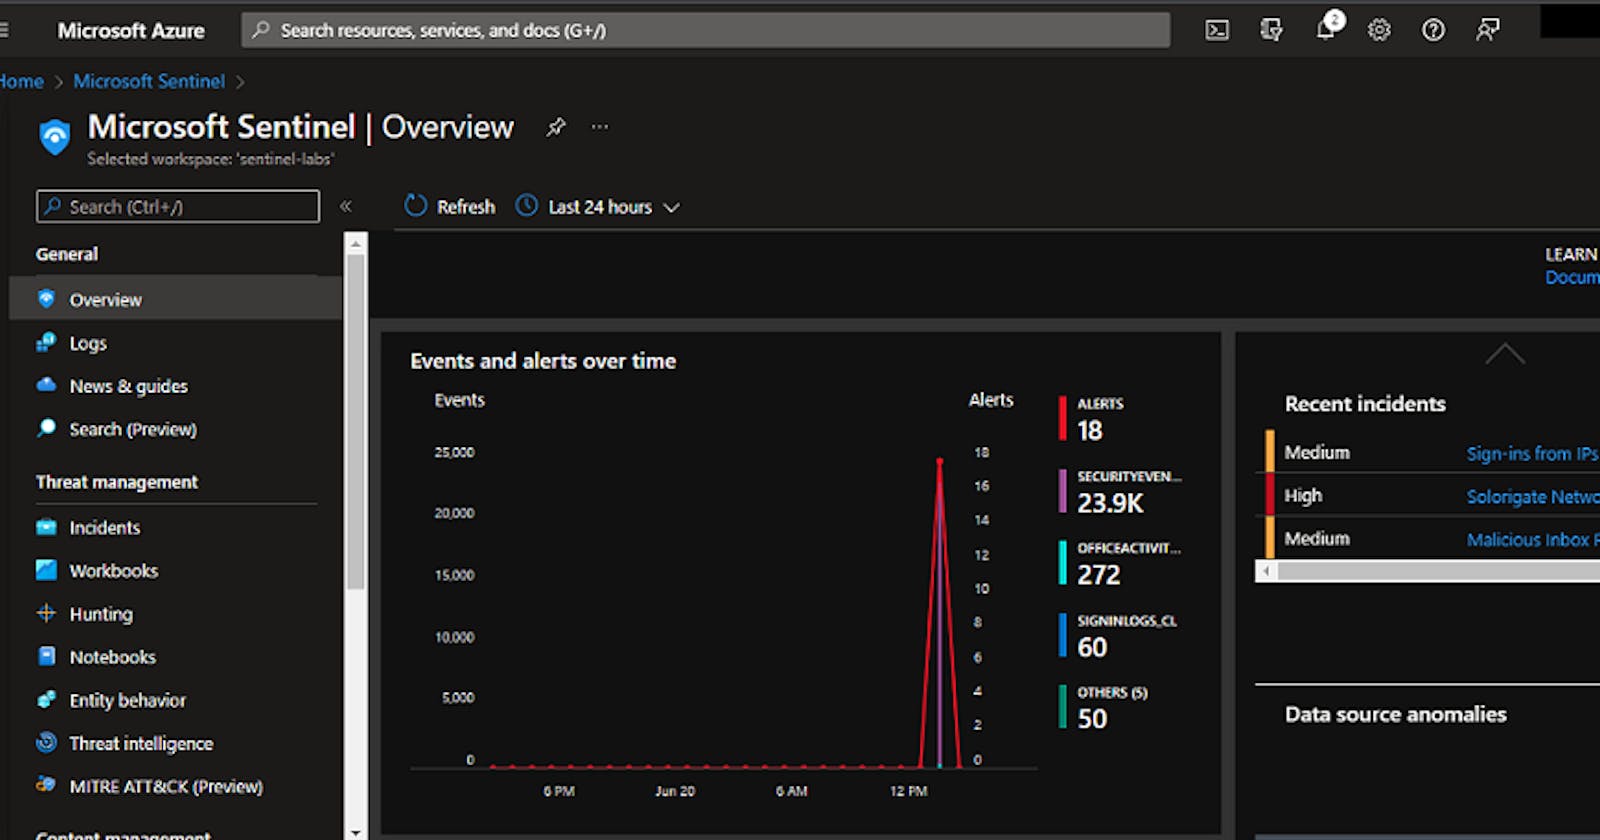
- Return to your Sentinel dashboard and select the workspace. Now you can see the workspace is now populated with logs, alerts, incidents, etc. It can take a few minutes for alerts and incidents to reflect so don't be alarmed if you don't see them immediately.
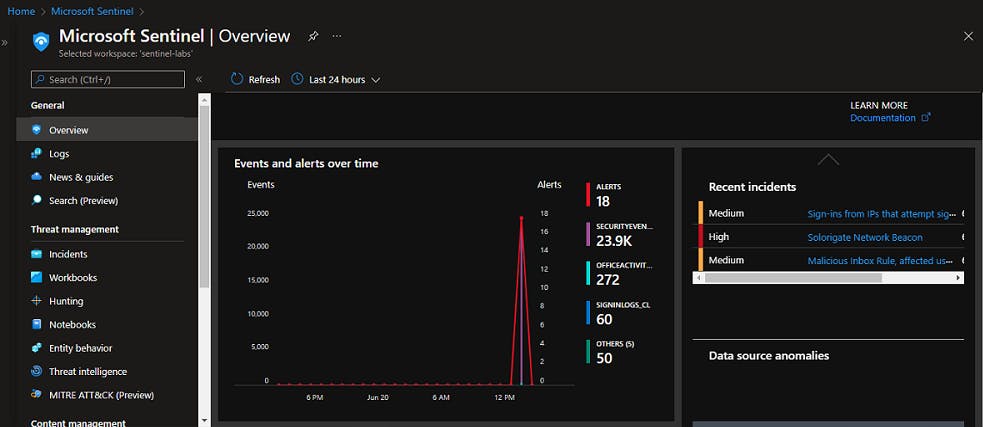
And you're all set!! Happy hunting!!!
Conclusion
I would like to conclude by pointing out that there are several sample data sources, not just the Microsoft Sentinel Training Lab solution, one of them is this repository. Microsoft also provides Training modules to aid in hands-on learning Let me know in the comments if you have any questions or clarifications.
I hope you found this helpful. Thank you and see you on the next one.

